This is default featured post 1 title

Go to Blogger edit html and find these sentences.Now replace these sentences with your own descriptions.This theme is Bloggerized by Lasantha Bandara - Premiumbloggertemplates.com.

This is default featured post 2 title

Go to Blogger edit html and find these sentences.Now replace these sentences with your own descriptions.This theme is Bloggerized by Lasantha Bandara - Premiumbloggertemplates.com.

This is default featured post 3 title

Go to Blogger edit html and find these sentences.Now replace these sentences with your own descriptions.This theme is Bloggerized by Lasantha Bandara - Premiumbloggertemplates.com.

This is default featured post 4 title

Go to Blogger edit html and find these sentences.Now replace these sentences with your own descriptions.This theme is Bloggerized by Lasantha Bandara - Premiumbloggertemplates.com.

This is default featured post 5 title

Go to Blogger edit html and find these sentences.Now replace these sentences with your own descriptions.This theme is Bloggerized by Lasantha Bandara - Premiumbloggertemplates.com.

Showing posts with label DIY. Show all posts

Tuesday, November 22, 2011

Newspaper Leaf Garland

Being Eco-friendly is always a plus in my book. Everyone knows that recycling is for the cool kids, so when I found this wonderful way to recycle my newspapers and create a beautiful garland, I was so excited! It's perfect for a creative and whimsical touch at wedding receptions.


photos via Life with Little Ones


This awesometastic newspaper leaf garland from Life with Little Ones is just unbe-leaf-ably (yep. I went there) cool and completely DIY. You can find the instructions right here.


What are some recycled wedding decorations that you've seen?

Monday, November 21, 2011

Silhouette Decor

Although we have a soft spot for fall weddings that are rustic and full of foliage, they can be just as autumn-tastic when celebrated with more sophisticated, classic decor.


That's why we are completely captivated by this silhouette pumpkin we found at Oh Lovely Day!


Via Oh Lovely Day! Via HGTV


Not only is this pumpkin a perfect addition to your wedding decor, it is completely DIY and you can find simple instructions right here.


As an added bonus, if think silhouettes are as classical-istic and chic as we do, you can compliment your darling DIY pumpkin with a just as wonderful cake topper from April Foster Events!


via April Foster Events


How sweet and sophisticated are those?! It gets better...they're DIY, too! (too good to be true, I know) Make your own by clicking here and you can create a completely one-of-a-kind cake topper that is sure to be a hit at your celebration!


Would you guys make your own decor for your wedding? 


Wednesday, November 16, 2011

Preserving Leaves

Fall is in full force, which means harvest and fall themed weddings are an extremely popular option for brides!


Via Emmaline Bride Via Martha Stewart

Fall Foliage is a great way to incorporate all of the gorgeous colors of Autumn into your wedding, but leaves tend to crumble and lose their vibrancy by the time your wedding comes around. That's why, when we stumbled upon a wonderful D-I-Y leaf preservation tutorial at Emmaline Bride, we were ecstatic!


Via Emmaline Bride Via Martha Stewart


It's super easy to do, and the tutorial gives you a variety of options and a ton of inspiration that will suit your wedding timetable and theme.


This is just one of the many examples of how fantastical your preserved leaves can be utilized at your special day:


Via Emmaline Bride Via Better Homes and Gardens


Find out how to preserve your own leaves here.


What are some ways you would incorporate leaves into an autumn wedding?


Tuesday, November 8, 2011

DIY Series: Mad-Libs Guest Book

It seems like everyone always has their own advice to offer when you start a new chapter in your life. Mom and Dad have words of wisdom, Grandma has old stories to learn from, and friends always seem to think they know best. But wouldn't it be great if you could get some advice that you're allowed to laugh out loud at?!?


Every time I turn around I keep finding more and more fun ways couples are spinning their guest books! This Mad-Libs guest book idea we found on Emmaline Bride is so fun! And it will leave the bride and groom in stitches even after the big day is over!


Now this looks like some advice I could take! What do you guys think of these??


Monday, November 7, 2011

Will You Be My Bridesmaid?

Any bride knows that having good bridesmaids is an important aspect of their wedding day. A bridesmaid is responsible for walking through countless hours of wedding day details with the bride, sitting through fittings and appointments with the bride, and even offering some Dr.Phil-worthy advice to keep the bride calm through all the wedding jitters and stress.


So don't you think they deserve something special for accepting such a pivotal role? These "Will You Be My Bridesmaids?" boxes we saw on The Wedding Chicks are such adorable and creative ways to ask your girls to take part in your wedding with you!


With the details and inspiration cards you ensure you get the best help from your bridesmaids!


Have you ever been asked to be a bridesmaid in someones wedding?? How did they ask you to share in their special day??

Friday, November 4, 2011

DIY Week Part 5

For the last day of this Do-It-Yourself Week I wanted to share these doily lanterns with you that I think are SO adorable and creative from Glamour & Grace! Who would have thought doilies could be so awesome, elegant, and fantastic all at the same time?!?


These are not your Gramma's Doily's!


To Make These Lanterns: 

   Step 1: Take your rubber ball or balloon and place it in a small dish to keep it steady while you work. Put a piece of wax paper underneath the ball to protect the dish. Begin placing the doilies on the ball, making sure the edges slightly overlap. This is what will keep the orb together after the fabric stiffener dries.

   Step 2Once you have
the doilies arranged how you want them, pour some fabric stiffener onto the
palate or wax paper. Start painting the fabric stiffener onto the doily,
ensuring you cover every bit, otherwise it won’t harden and the uncoated parts
will sag.


   Step 3: Leave a small opening somewhere to insert your LED tea light.

   Step 4: Let the doilies dry overnight to ensure they are COMPLETELY dry. 

   Step 5


Once the
doilies are dry, use a blade to pop the balloon/rubber ball. Carefully pull the
ball out through the hole you left open in the doilies. And Vio'la! 


You can even attach a ribbon to hang them around your event!


How much do you guys love these lanterns?!?

Thursday, November 3, 2011

DIY Week Part 4

For part four of this Do-It-Yourself week, I love love loved these retro pin wheel centerpieces from Emmaline Bride they found by Elizabeth St on Etsy! These adorable pin wheels are such a great way to make your bridal shower or retro wedding that much more fun!


I loved these, what do you guys think of them??

Wednesday, November 2, 2011

DIY Week Part 3

For part three of DIY week I couldn't resist these cupcake signs from Boho Weddings & Events. As if cupcakes aren't adorable enough, these signs make them even more perfect!


I would say "I do" to these cupcakes, wouldn't you??

Tuesday, November 1, 2011

DIY Week Part 2

So I'm not sure I've ever met anyone (well except for my friend, Sissy... but I won't count her) who didn't like marshmallows, and how could you not when they're as fun as these are! These Marshmallow Pops from Austin Weddings would be such a great idea for weddings favors for your guests!


This could be a great project to enlist the help of your bridesmaids to do with you just before the big day!


OR!!! What a fun idea for a dessert station! Maybe it's just me, but I think I'd be glued there! "Oh, where is Melissa.... oh that's right, she's at the marshmallow station - still...."


What have been some of your favorite wedding favors??

Monday, October 31, 2011

DIY Week Part 1

I absolutely love Do-It-Yourself projects because they're fun and they bring such a personal element to any event!


This week I want to highlight a few that I thought were the awesomesauce of DIY projects.


These mason jar name cards we found from Emmaline Bride and Style Me Pretty are so adorable and something your guests can use even after they find their table!


Photo By: Beaux Arts Photography 


How To:

          -Apply 2 coats of chalkboard paint on your jar

         -When dry, use a chalk marker to write your guests name or any other message!


What do you guys think of these jars? Are they not adorable?!?

Thursday, October 27, 2011

A Guestbook Set in Stone

Everyone knows the best part of a wedding are the memories you get to take with you-but what if those memories could be a little more set in stone? This was such an easy and awesome alternative to a guest book we found from Emmaline Bride!


Photo By: Cabana Pictures

Here's how it works- Each guest signs their name on one side of a stone and then chooses a word they think describes the bride or groom on the other, and places them in their respective buckets. Then after the wedding, the bride and groom are left with memories of how much all their friends and family love them!


This would be so great to decorate your garden or use to make a centerpiece to place in your house!


Have you guys ever signed personal guestbooks?? What were some of the ideas you loved??

Wednesday, October 19, 2011

Unique Groomsmen Gifts

When thinking up fun and thoughtful gifts for your wedding party, the bridesmaid gifts are a snap! There are so many adorable and perfect gifts that your closest girls will love, cherish, obsessed over, etc.


...but what about the groomsmen?


Thanks to this unique and delish idea we found over at Floridian Weddings, that question is easily answered:


Via Floridian Weddings


A DIY Groomsmen Goodie Box full of food and booze (for these are a few of their fav-o-rite things)!


Via Floridian Weddings


This gift box is not only super fun and full of wonderful treats like brownies, Maker's Mark (which is my husband's favoritest in the whole wide world), and a miniature flask that your groomsmen will surely appreciate, it's simple to make as well! Floridian Weddings gives you complete DIY instructions on how you can create this giftbox (and those delectable looking brownies) yourself.


{This post is in honor of the wonderful John DiStefano (ahem, that's my hubs) and his love of Maker's Mark}

Tuesday, October 4, 2011

Churros Are Delicious

I am a sucker for all things sugar-coated, so when I stumbled across this fantastical idea from Simply Perfect Weddings, I simply had to share it!


A make-your-own Churro bar!!! So fun, so easy, SO delicious!


Pick a Churro, put in the toaster....


Roll in your favorite coating....


And uh, dip!


My stomach is starting to growl thinking about the cinnamon-sugary-goodness that this Churro bar will bring. Mmmmmm!


How much fun will your guests have creating their own churro creations!?


Click here to find out how you can create this DIY display of yumminess for yourself!

Friday, August 19, 2011

DIY: Paper pomander- flower balls

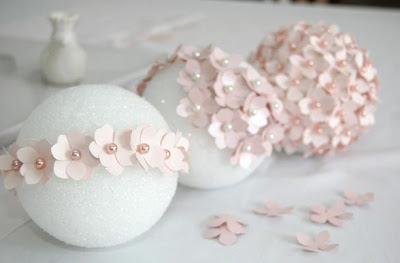
Check out this great DIY project I found on Hostess with the Mostess! These paper pomander-flower balls would be great as table centerpieces for any event! They're really easy to make, go ahead and give them a whirl!


Aren't they adorable? What do you guys think?

Friday, February 26, 2010

DIY Favors: Paper Cake Slice

We saw this posted on the How About Orange blog and loved this idea as a DIY project for wedding favors.  The paper cake slice is so adorable and perfect to fill with whatever candy or favor you want!  It is a great unique detail to add to any wedding.  You can even use different color paper to make different "flavored" cakes! 

Find the simple instructions at Paper Source Blog.

Friday, January 22, 2010

Guest Blogger! With this Ring - DIY

I am loving all of Darci's DIY projects! I cannot thank her enough for these posts! It really makes you realize these are do'able! So, without further ado, here is Darci's DIY Envelope Liners!!

Seeing as how I am a glutton for punishment, I decided to make my own envelope liners for our wedding. It sounds like a daunting task at first but I can assure you that if you give yourself enough time, it can be worth it to have envelopes lined in the paper you have year heart set on (which is why I started this project to begin with)!


It's sometimes easier to pull the envelope apart, but I tried to conserve so I measured one that was still in tact. I used a regular manila envelope to create a template, and started by cutting it so that it was 1/8 of an inch shorter than the envelope on each side:

For the top portion, I cut the manila envelope so that it was about 1/4 of an inch from the top point of the envelope. Then I put the entire square into the envelope itself:

Then I put a ruler at the top of the point and made a (clearly not so straight) line onto the template so that I had a mark for the upper most point:

Then take a ruler and make a line from the crease of the envelope to the mark you just made for the upper most center point:

Make those lines on either side and then cut off the corners...and there's your template! Honestly, making the template perfect took me the longest. From here on out is pretty straightforward.

Just put the template on your paper of choice and trace away. If you use a corner of the paper you only have to make three quick lines:

Cut the liner out along the lines you just made:

And insert into the envelope!

Now you just need to get a nice crease so that it all folds together nicely. So I just folded the envelope flap down and used a boning folder along the edge to make a crease:

Now you just take a tape roller (these things save a ton of time) and put tape on each of the edges:

Press it into the envelope flap, and viola! Once the template is finished it takes just a few minutes to make the actual liner. I traced a bunch of them at once, and then cut about 25 of them in under a half an hour.

Share

Twitter Delicious Facebook Digg Stumbleupon Favorites